Getting Started
Concepts
SchedulePro Integration Token: A JSON web token provided by SchedulePro that must be included in each request to our API. It encodes information about your organization and permissions. Each organization can have multiple tokens active at once. These tokens can be managed within SchedulePro itself (provisioned, deleted, and viewed/copied once on creation).
SchedulePro Developer API Portal: The web interface for SchedulePro's Developer API, containing documentation of SchedulePro's API endpoints, sample code, and an interactive web console for testing API requests. Developers must have a verified account in this portal to make API calls.
What you'll need
A SchedulePro integration token, or access to a SchedulePro System Admin account with which to provision a token.
A developer portal account at developer.scheduleproweb.com which has been verified and granted access to the test and/or production APIs.
Setting up your developer portal account
Sign up for a developer account
Have your manager or your organization's SchedulePro administrator contact us to verify your identity
After receiving confirmation that you've been verified, you should receive a subscription key that allows you to use our API
In order for us to verify that you are a developer with an organization that is authorized to use SchedulePro's APIs, please have your manager or SchedulePro administrator contact us to confirm your identity. Once we've received this confirmation, we will be able to grant you access to the SchedulePro test and/or production APIs, as appropriate, which you will see under the list of available APIs.
In order to use an API, you will need to input your subscription key in the request header body of your API calls. Subscription keys are simply used for tracking purposes.
Acquiring a SchedulePro integration token
Log in to your organization's SchedulePro account with the System Admin login.
Go to Settings > Integration Tokens > New > enter the name for your new token > Create > copy to clipboard.
If you do not have a SchedulePro integration token provided to you already, you will need to get the login credentials for a system administrator account with [ALL] permissions from the SchedulePro focal point for your company (set up in SchedulePro under Settings > Manage Users). Be sure to choose the System Administrator role when you log in. Once you've logged in, you can provision a SchedulePro API integration token following the steps in this video. Note the GUID shown in parentheses next to the organization name, as this will be required for each API call.
For users with accounts in multiple instances: Many companies will have multiple instances in SchedulePro. For example, operations and maintenance may have separate accounts. If you are developing for a company with multiple instances in SchedulePro, you can create a system administrator user with the same email in each of these instances. When logging in, choose any account from the list and then choose the System Administrator role. Then navigate to Settings > Integration Tokens to create a token. This token will be valid for all the selected instances, and you can refer back to the Organization column to double-check which instances an existing token can be used in (video walkthrough).
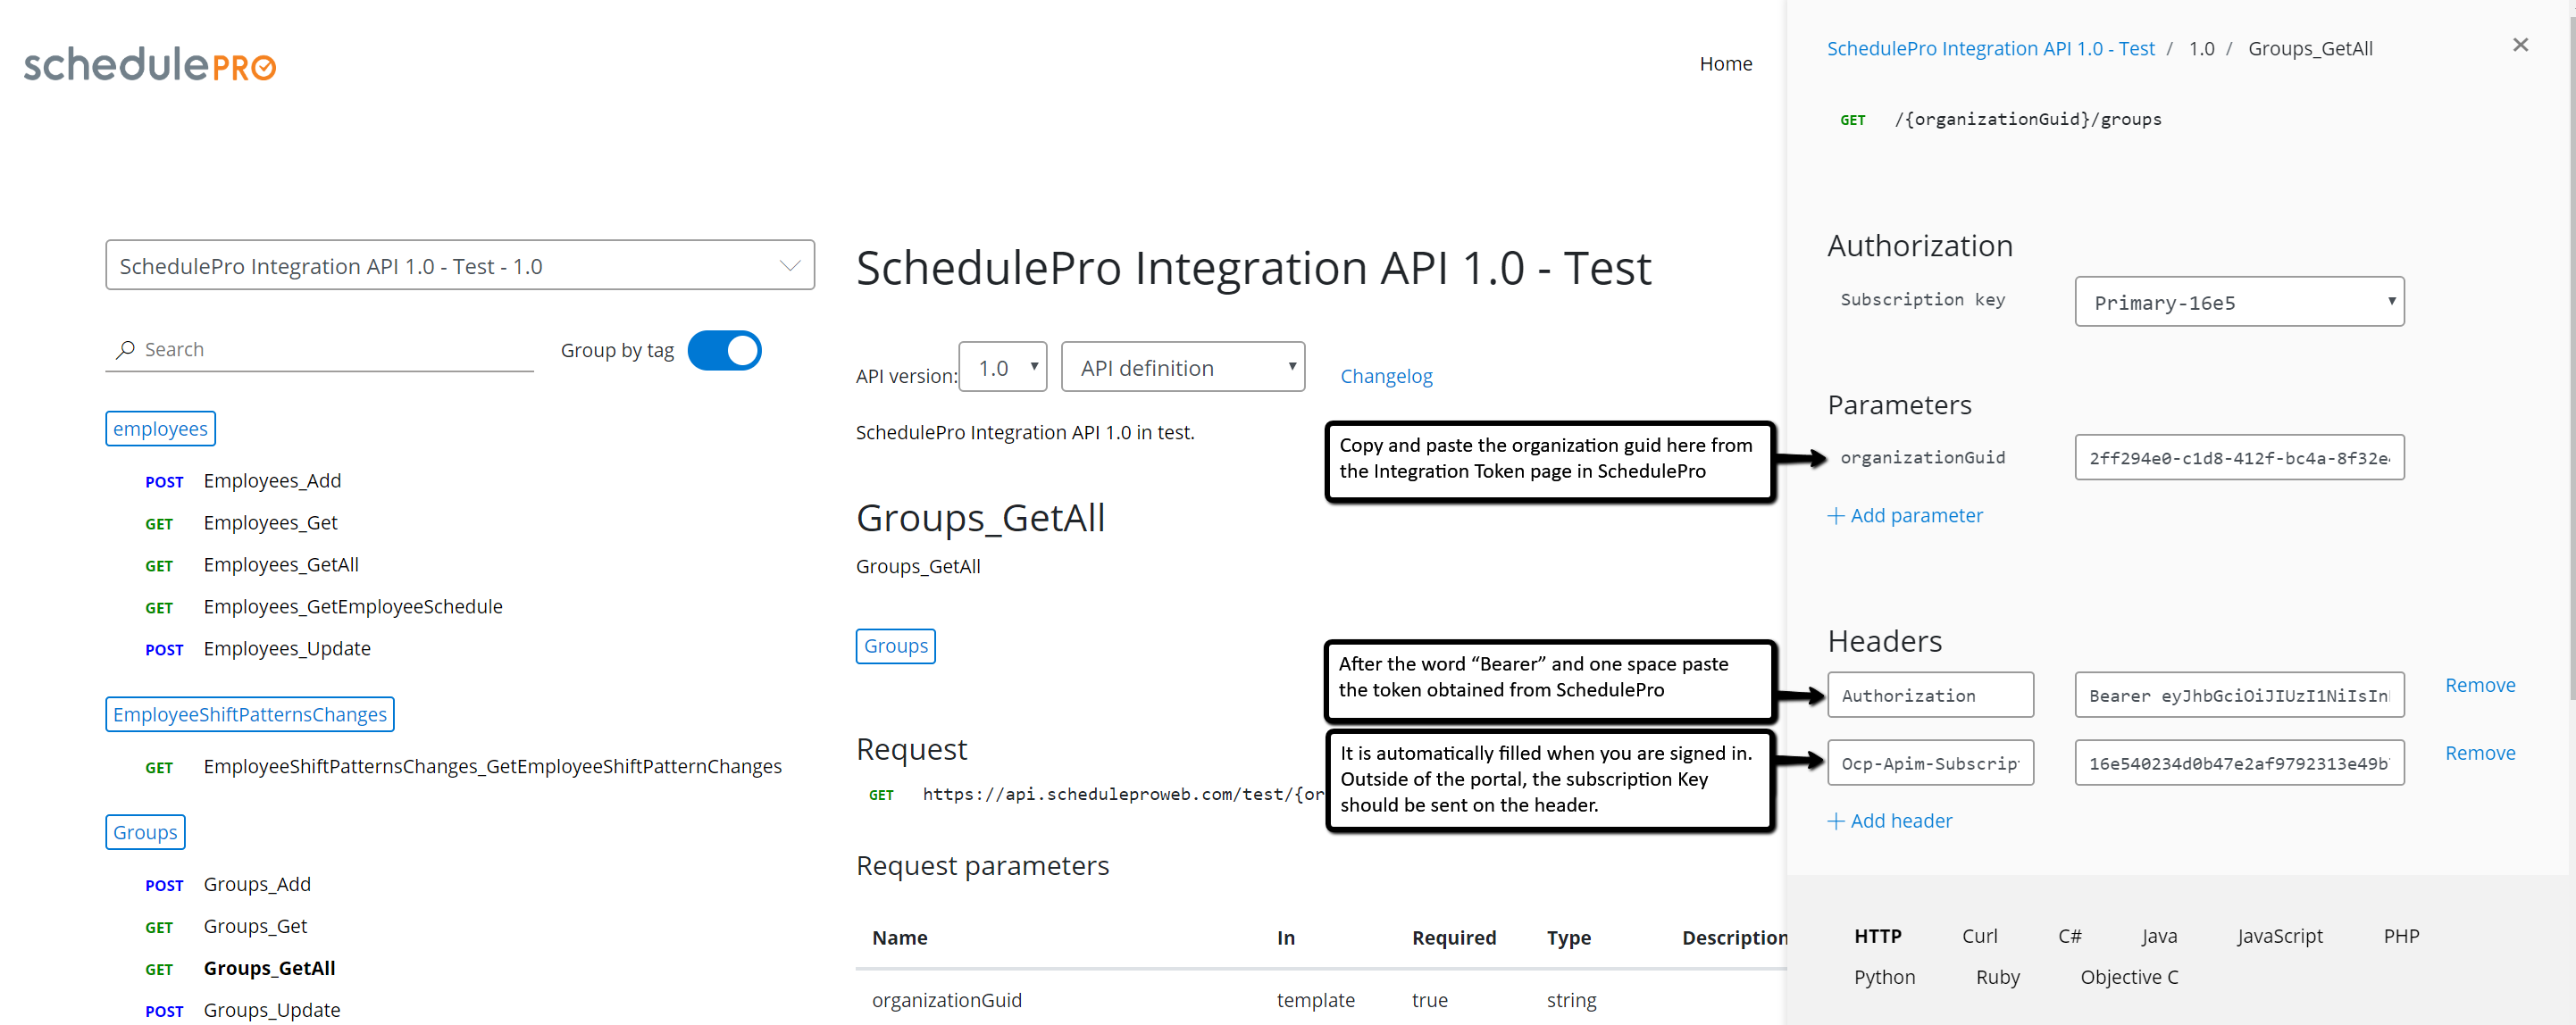
Making a sample API call
Once you've set up your developer portal account and acquired a SchedulePro integration token, you have everything you need to start developing with SchedulePro's APIs. Go to the list of available APIs, and click on the one that matches the organization where you provisioned your token (i.e. test if the token was provisioned in a test organization, production otherwise). You will then see a list of all available methods with auto-generated documentation and code samples. You can try any one by copying in the GUID for the organization which you want to access and adding an Authorization header to your request in the form "Bearer [integration token]", as shown below.